Knowledge is the sharpest blade
The Codex
Everything a newly turned angel or demon must learn: the laws of the conflict, the tools of the trade and the crafts that forge legends.
Read before you fight
Laws of the Conflict
The system offers endless possibilities, but a few things are forbidden, for your own good.
- The Eternal Conflict region is sanctuary. No combat of any kind in the High Heavens, in Hell or anywhere on the Eternal Conflict region, not with the A&D HUD, nor any other HUD or system. The region is a complete safe-zone.
- War has no referee. There are no rules, punishments or official complaints for attacks between opposite species, attacks on Criminals, events arranged by the Sators, or fights within a conflict officially declared by a Chieftain or Cardinal.
- Keep the secret. Never reveal to a mortal that they are being tainted or blessed, unless you are about to descend or transcend them.
- Trade only on the Marketplace. Backpack items may be sold only on the A&D System Marketplace (gifting is fine). Products such as blood tanks must be rezzed and set for sale so the buyer purchases directly.
- Do not disguise system objects. Don't modify or cover system objects to imitate prize variants (e.g. glowing or recoloured hatchets, pickaxes and chisels).
- No Arranged Kills or ALT Killing. Killing alts or arranged victims to gain an unfair advantage (achievement boards, Born to Kill or anything else) is severely punished, up to a system ban.
- No cheating tools. Third-party programs, viewers, auto-clickers, bots or scripts that give an unfair advantage mean a permanent system ban. Followers, attachers, flight boosts and the like are allowed.

Your weapon and your pulse
The Main HUD
The Main HUD is how you fight, feed and learn about yourself and others. The left bar is your health (Blood for Demons, Brightness for Angels) and the right bar is your Mana, the energy your fighting skills consume.
Curse & Purify: feeding
- Stand within 5 metres of a mortal and press the Curse (Demons, the eye) or Purify (Angels, the white light) button.
- Choose the mortal from the menu. Angels and Demons cannot be fed upon.
- A scale appears: Tainted on the red side, Blessed on the blue. Demons drag it toward taint, Angels toward blessing, and your health rises as you feed.
- Once the mortal is fully tainted or fully blessed, you gain nothing more from them. Press the button again to stop.
Scans & Perception
Know thyself
Reads your health, Legion or Domain, age, status, Overlord or Mentor, Horde or Choir, minions or disciples, mana and Essence or Ergs into local chat.
Know thy enemy
Pick anyone nearby to learn whether they are Angel, Demon or mortal, and how blessed or tainted a mortal is.
Sense the unseen
Count the spiritual beings in your region. Past 50% skill you see each side's numbers; at 100% you see every name, age and armor rating.
Fighting skills
Every Demon begins with Pyrokinesis and every Angel with Smite. As your character ages, deadlier skills unlock according to your Legion or Domain, with longer cooldowns and higher mana costs.
- Target an Angel or Demon within 10 metres using the target button at the top of the HUD.
- Face your target and press a skill. Damage appears on your HUD and in local chat.
- If you turn away, the target is out of sight: the skill still cools down but costs no mana. Leave range and you disengage.

Everything you carry
The Backpack HUD
Your resources (reagents, potions, ores, ingots, logs, parchments, inks, gems), along with your armor, jewelry, spellbook and profession skills live in the Backpack. It runs entirely server-side, so your inventory is always in sync.
Inventory
- Every item in its own slot, with amounts drawn beneath. Drag and drop to rearrange; drag to the window edge to change pages.
- Filters: All, Mining (ores & ingots), Alchemy (reagents & potions), Inscription (logs, parchments, inks) and Armor.
- Refresh re-syncs everything; Move Lock stops accidental dragging; Item Tracking pins up to three item counts under your potion buttons.
Item details
Click any item to open its details: name, description, type and class, with actions depending on the item: Assign potions to your quick-drink slots, Use event items, Track an amount, or Give items to another member of your species within 5 metres.
Never fight alone
The Party HUD
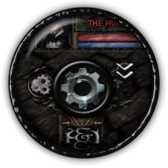
Form a party of up to five members of your own species and watch over each other: profile pictures, names, health and mana are shown live, and fallen members are marked Banished or Faded.
- Create Party, name it, then use the cog to invite anyone within 20 metres, or disband.
- The settings menu lets you block or unblock people from sending you invites.
- Collapse or expand the member list with the arrow.
Strategy between battles
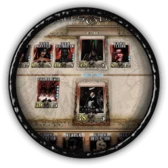
The Card Game
A HUD-based strategy card game for living Angels and Demons, playable against anyone, from anywhere on the grid.
- Coins: each game costs one. You regain a coin every two hours, up to ten.
- Private games invite a specific player by UUID; public games are open to anyone. Joining shows the creator's name above each open game.
- Your middle card is you; your opponent's middle card is them. Health is on the left of each card, attack on the right.
- Placing cards costs stamina (the blue diamonds): 2, 3 or 5 per card. You gain 2 stamina at the end of each turn.
- Taunt cards must be attacked first. Attacking trades damage both ways; a card at 0 health is destroyed.
- Bring your opponent's main card to zero to win.
Profession · Alchemist
Alchemy & Herbalism
Herbalism gathers reagents from the plants of Heaven and Hell; Alchemy turns them into potions, ink and vials at the Alchemy Tables in the labs of Heaven and Hell. Both skills start at 0% and rise by 0.1% with practice, and even a failed attempt can teach you.
Every night at midnight SLT your Alchemy drops by 0.1%. Herbalism never decays, and no skill decays once it is at 100% or higher.
Profession titles
| Skill | Title |
|---|---|
| 0 – 30 | Neophyte |
| 30 – 50 | Novice |
| 50 – 60 | Apprentice |
| 60 – 70 | Journeyman |
| 70 – 80 | Expert |
| 80 – 90 | Adept |
| 90 – 98 | Master |
| 98 – 100 | Grandmaster |
Recipes
| Make | Alchemy | Reagents (lost on fail) | Effect |
|---|---|---|---|
| Lesser Mana Potion | 0% | 1 Nightshade (none) | +20–30 mana |
| Normal Mana Potion | 40% | 2 Nightshade (1) | +40–60 mana |
| Greater Mana Potion | 80% | 5 Nightshade (2) | +60–100 mana |
| Lesser Heal Potion | 0% | 1 Mandrake Root (none) | +200–300 health |
| Normal Heal Potion | 40% | 2 Mandrake Root (1) | +400–600 health |
| Greater Heal Potion | 80% | 5 Mandrake Root (2) | +600–1000 health |
| Ink | 40% | 2 Nightshade + 1 Mandrake Root (none) | Needed to write spell scrolls |
| Stoneskin Potion | 90% | 5 Blood Moss (2) | +15% armor points for 10 minutes |
| Resistance Potion | 100% | 5 Blackthorn (2) | +15% spell shield for 10 minutes |
| Vial of Haste | 100% | 12 Blackthorn + 12 Blood Moss (5 + 5) | Shorter casting time on your first spell after drinking |
- You can drink 10 mana potions and 3 heal potions per day.
- Stoneskin can't go in a potion slot; use it from your Backpack. The Vial of Haste can go in a quick-use slot.
- Normal and Greater potions only appear on the Alchemy Table's menu once your skill reaches 40% and 80%.
- Past 40%, Lesser potions stop teaching you (but you'll succeed more often than you fail); past 80%, only Greater potions do. Ink and Stoneskin teach you all the way to 100%.
- At 100% Alchemy you will almost always succeed.
Herbalism
Mana
Mana potions and ink.
Healing
Heal potions and ink.
Stoneskin
Stoneskin potions and the Vial of Haste.
Resistance
Resistance potions and the Vial of Haste.
The four plants grow all around Heaven and Hell. Stand within 5 metres of one and harvest; it takes 10 seconds, with a countdown above the plant, and you can only gather one plant at a time. At 80% Herbalism you may pick two reagents from one plant, and at 90% that chance doubles. Reagent Vendors sell them too, but bought reagents teach you nothing.
Profession · Crafter
Mining & Blacksmithing
Mine ore with your Pickaxe, smelt it into ingots at the Forge, and hammer ingots into armor at the Anvil. Worn armor reduces the damage you take. Iron is the weakest and easiest to make; Infernal is the strongest and rarest, and also adds Spell Shield. Each piece counts on its own, so you can mix metals, but a full set is always stronger. Armor only protects you while you wear it.
0.1% at a time
Each gain is 0.1%, with a 1 in 10 chance of 0.2%, and failures can still teach you. Mining and smelting train Mining; crafting trains Blacksmithing.
Nightly
Blacksmithing drops 0.1% each night. Mining never decays, and no skill decays at 100% or higher.
Same species
Vendors sell only Iron ore (L$20) and Copper ore (L$30), and never ingots. Ore, ingots and armor can be sent through the Backpack, but only to your own species.
Mining
With your Pickaxe attached, face a mining spawn within 3 metres and press Mining on your Backpack HUD; many players can share a spawn. Each swing takes 5 to 15 seconds. The higher your skill, the more often you find rare ore.
| Mining | Ores you can find |
|---|---|
| 0% | Iron |
| 30% | + Copper |
| 60% | + Valorite |
| 80% | + Mythril |
| 90% | + Bloodrock (empty swings become rare) |
| 100% | + Blackrock, Lunarsteel |
| 110% | + Infernal (and a little more Lunarsteel) |
| 120% | More Infernal |
Smelting
One ore makes one ingot. Stand within 3 metres of a Forge and click it: it takes 20 seconds to heat, then you choose the metal to smelt. After each attempt the forge reheats for 5 seconds. A forge stays yours (its floating text shows who is using it) until you walk away. Smelting stops teaching Mining after 100%. While your Mining is low, smelting higher-grade ore teaches you faster.
| Mining | Iron – Valorite | Mythril – Lunarsteel | Infernal |
|---|---|---|---|
| 0% | 1 in 5 | 1 in 8 | 1 in 15 |
| 10% | 1 in 4 | 1 in 7 | 1 in 14 |
| 20% | 1 in 3 | 1 in 6 | 1 in 13 |
| 30% | 1 in 3 | 1 in 5 | 1 in 12 |
| 40% | 1 in 2 | 1 in 5 | 1 in 11 |
| 50% | 1 in 2 | 1 in 4 | 1 in 10 |
| 60% | 1 in 2 | 1 in 4 | 1 in 9 |
| 70% | 1 in 2 | 1 in 4 | 1 in 8 |
| 80% | 1 in 2 | 1 in 4 | 1 in 7 |
| 90% | 1 in 2 | 1 in 4 | 1 in 6 |
| 98% | 1 in 2 | 1 in 3 | 1 in 5 |
| 100% | Always | 1 in 2 | 1 in 4 |
| 110% | Always | 1 in 2 | 1 in 3 |
| 120% | Always | 1 in 2 | 1 in 2 |
Your chance to succeed. Iron – Valorite covers Iron, Copper and Valorite; Mythril – Lunarsteel covers Mythril, Bloodrock, Blackrock and Lunarsteel.
Blacksmithing
With your Smith's Hammer attached, face an Anvil within 3 metres and press B.Smith on your Backpack HUD, then choose what to make; several players can share an anvil. Armor can only be made from ingots. Finished armor waits in the Item Delivery Kiosk (the treasure chest), which shows five pieces at a time; iron weapons no longer go there.
| Blacksmithing | Metal |
|---|---|
| 0% | Iron |
| 30% | Copper |
| 60% | Valorite |
| 80% | Mythril |
| 90% | Bloodrock |
| 100% | Blackrock, Lunarsteel |
| 110% | Infernal |
| Piece | Ingots (lost on fail) | Repair |
|---|---|---|
| Chest | 100 (20) | 15 |
| Leggings | 55 (10) | 9 |
| Boots | 40 (7) | 6 |
| Gauntlets | 20 (5) | 4 |
| Pauldrons | 10 (3) | 4 |
| Infernal Pauldrons | 1 Xulreth's Horn + 10 Infernal + 5 Bloodrock + 10 Copper ingots (10 Infernal) | 16 Infernal |
Armor worn for a full week drops to 0% durability and must be repaired. It doesn't wear while unworn or while you're offline. Check durability with the Armors button on your Backpack HUD, which also hides or shows each piece.
Iron weapons
Weapons are practice pieces made only from Iron ingots: a Knife (2 ingots, 1 lost on fail) teaches you up to 50%, a Dagger (4, 2 on fail) up to 70%, and a Longsword (6, 3 on fail) up to 98%. After that only armor raises Blacksmithing, up to its 110% cap.
Tome of Mining
Can drop while mining once your Mining reaches 100%. Each one raises your Mining cap by 10%; you can use two, for 120%. Not tradeable.
Tome of Blacksmithing
Can drop while mining once your Mining reaches 100%. Raises your Blacksmithing cap by 10%, to 110%. Not tradeable, and you only ever get one.
Profession · Mage
Lumberjacking, Inscription & Magery
Chop logs and yew branches, press them into parchment, write spell scrolls with ink, and cast the spells in your spellbook. Spells add a new branch to combat: some strike your enemies, others strengthen you or your allies.
0.1% at a time
Each gain is 0.1%, with a 1 in 10 chance of 0.2%, and failures can still teach you. Chopping and making parchment train Lumberjacking, writing scrolls trains Inscription, and casting trains Magery. Making ink trains Alchemy.
Nightly
Inscription and Magery drop 0.1% each night. Lumberjacking never decays, and no skill decays at 100% or higher.
Same species
Vendors sell logs (L$5) and Rank 1 parchment (L$10). Higher parchment and all spells must be made by hand. Logs and parchment move through the Backpack, and scrolls through the Mailbox, but only to your own species.
Lumberjacking
With your Hatchet attached, face a tree within 3 metres and press Lumberjacking on your Backpack HUD; many players can share a tree. Each swing takes 5 to 15 seconds, and the higher your skill the less you fail. At 110% Lumberjacking trees can also give Yew Branches.
Parchment Making Station
| Parchment | Made from |
|---|---|
| Rank 1 | 1 Log |
| Rank 2 | 4 Logs |
| Rank 3 | 10 Logs |
| Rank 4 (110% Lumberjacking) | 2 Logs + 2 Rank 3 Parchment + 2 Yew Branches |
Sit on the station, click it and choose a rank. A successful parchment hangs on the rack, Drying, for one minute; click it once it says Dry to put it in your Backpack. You can keep making more while others dry. The rack holds 8 parchments; anything made with a full rack is lost. Don't stand up until every parchment is collected, or the ones left hanging disappear. A station is yours (its floating text shows who) until you get up.
Inscription
Sit at an Inscription Desk and press Inscription on your Backpack HUD. Pick a circle (only the circles your skills allow appear, plus Make Last), then a spell. Each scroll takes one parchment of its circle's rank plus one Ink. There is no limit to how many scrolls you can keep.
| Scroll | Made from | Spells |
|---|---|---|
| First Circle | Rank 1 Parchment + Ink | Cure, Reactive Armor, Harm, Poison |
| Second Circle | Rank 2 Parchment + Ink | Dispel, Protection, Energy Bolt, Incognito |
| Third Circle | Rank 3 Parchment + Ink | Magic Reflection, Mana Vampire, Flame Strike, Paralyze |
| Fourth Circle | Rank 4 Parchment + Ink | Leech, Mana Surge, Life Flare, Rejuvenation |
Magery
Open your spellbook from the Backpack HUD. The number beside each spell is how many scrolls you have; casting uses one scroll and its mana. Spells meant for others go to whoever you have targeted on your Main HUD. Clear your target to cast on yourself, and never buff an enemy by mistake.
Tome of Lumberjacking
Raises your Lumberjacking cap by 10%, to 110%.
Tome of Inscription
Raises your Inscription cap by 10%, to 110%.
Tome of Magery
Raises your Magery cap by 10%, to 110%.
All three can drop while lumberjacking once your Lumberjacking reaches 100%. None are tradeable, and you only ever get one of each.

Profession · Jeweler
Chiseling, Gemcutting & Jewelcrafting
Three crafts that work together: chisel crystals from the crystal spawns, cut them into gemstones, and craft rings, pendants and bracelets from ingots. Imbue a gemstone into a piece of jewelry and it grants its bonus: more damage, spell shield, mana regeneration, better gemcutting luck or stronger heal potions.
Heaven and Hell each have a Jewelcrafting Area with crystal spawns, a Gemcutting Station and a Jewelcrafting Table, and a place to get your Backpack HUD. You'll find them on Helcaraxe Isle and Beachcomber Oasis.
0.1% at a time
Every skill starts at 0.0% and rises to 100.0%. Each gain is 0.1%, with a 1 in 10 chance of 0.2%, and you can still gain skill when an attempt fails. Chiseling trains Chiseling, cutting trains Gemcutting and crafting trains Jewelcrafting.
Nightly
Gemcutting and Jewelcrafting lose 0.1% every night. Chiseling never decays.
Never fails
Placing a gemstone into jewelry uses no skill and always succeeds.
Buying & trading
- Crystals: only Citrine is sold at the vendors (L$30 per crystal). Ruby, Onyx, Topaz and Diamond must be chiseled yourself, since their gemstones give strong combat bonuses.
- Gemstones are never sold. Buy Citrine crystals and cut them at the Gemcutting Station.
- Crystals, gemstones and jewelry can be sent through the Backpack, but only to your own species.
Chiseling
Stand within 3 metres of a crystal spawn, face it, and press the Chiseling button on your Backpack HUD with your Core Object attached. Several players can chisel the same spawn at once. Each strike takes 5 to 15 seconds.
| Chiseling | Crystals you can find |
|---|---|
| 0% | Citrine |
| 50% | Ruby, Citrine |
| 80% | Topaz, Onyx, Ruby, Citrine |
| 90% | Diamond, Onyx, Ruby, Citrine |
Any strike can also come up empty.
Gemcutting
Sit at the Gemcutting Station and press the Gemcutting button on your Backpack HUD. Choose the gemstone type; one crystal makes one gemstone, unless it shatters. The quality is random, Flawed, Normal or Perfect, and the better your skill the better your chances. Perfect Diamond, Topaz and Onyx are the rarest of all.
| Gemcutting | Gemstones you can cut |
|---|---|
| 0% | Flawed Citrine |
| 40% | Flawed Ruby and Citrine |
| 70% | Normal and Flawed Ruby and Citrine |
| 80% | Normal and Flawed Topaz, Onyx, Ruby and Citrine |
| 90% | Perfect Citrine, plus all of the above |
| 98% | Perfect Ruby and Citrine, Normal Topaz, Onyx, Ruby and Citrine, all Flawed |
| 100% | Every gemstone, Perfect Diamond, Topaz and Onyx included |
Better cuts
Raises your chance to cut higher-quality gemstones.
Stronger potions
Increases the effect of heal potions.
Mana
Increases your mana regeneration rate.
Spell Shield
Increases your spell shield.
Damage
Increases your maximum damage.
Every bonus grows with quality: Flawed < Normal < Perfect.
A gemstone's power fades once it is imbued. Its timer starts only when it is placed in jewelry, and a gauge beside the socket shows how much life it has left. When the gauge empties, the gemstone breaks and disappears.
| Gemstone | Lasts after imbuing |
|---|---|
| Any Flawed | 1 week |
| Any Normal | 2 weeks |
| Perfect Topaz, Ruby, Citrine | 1 month |
| Perfect Diamond, Onyx | 2 months |
Jewelcrafting
Sit at the Jewelcrafting Table and press the Jewelcrafting button on your Backpack HUD. Jewelry is made from ingots and comes out empty: every piece has 1 gem socket, with a rare chance of 2. Collect what you craft from the Item Delivery Kiosk (the treasure chest); its Accessories button lists only your jewelry.
| Jewelcrafting | Rings, pendants & bracelets | Lasts while worn |
|---|---|---|
| 0% | Iron | 24 hours (D15) |
| 30% | Copper | 27 hours (D17) |
| 60% | Valorite | 41 hours (D25) |
| 80% | Mythril | 69 hours (D42) |
| 90% | Bloodrock | 97 hours (D58) |
| 98% | Blackrock | 152 hours (D91) |
| 100% | Lunarsteel | 168 hours (D100) |
| 110% | Infernal | 175 hours (D110) |
Durability only drops while the jewelry is worn.
Tome of Jewelcrafting
Can drop while chiseling once your Chiseling reaches 100%. Use it to raise your Jewelcrafting cap by 10%, to 110%. It is not tradeable, and you can only ever receive one.
Infernal jewelry
Infernal rings, pendants and bracelets can only be crafted at 110% Jewelcrafting.
| Piece | Ingots (lost on fail) | Infernal (lost on fail) | Repair |
|---|---|---|---|
| Ring | 3 (1) | 10 (3) | 1 |
| Pendant | 5 (2) | 15 (5) | 2 |
| Bracelet | 7 (4) | 20 (7) | 3 |
To repair, sit at the Jewelcrafting Table, open the piece in your Backpack and press Repair. Stay seated until the repair finishes, or it fails.
Jewelry bonuses
Every crafted piece rolls one bonus, shown in its item details in the Backpack. A bonus only works while the jewelry is worn and has at least one gemstone imbued.
| Metal | Possible bonuses |
|---|---|
| Iron, Copper, Valorite | 5–10 Armor Points · Slightly better Mining success · +1 to +2 Strength (rare) |
| Mythril | 10–20 Armor Points · Moderately better Lumberjacking success · Slightly more Tairise Relics while Mining, Lumberjacking and Chiseling (rare) |
| Bloodrock | Stronger heal potions · 20–30 Armor Points · Slightly higher chance for the 2nd attack's bonus (rare) |
| Blackrock | 50–100 Armor Points · +2 to +4 Strength · Stronger Land Dominion, so you take land faster (rare) |
| Lunarsteel | 100–200 Armor Points · Moderately better Magery success · Cheaper Flame Strike (rare) · Slightly more stat points while Mining, Lumberjacking and Chiseling (rarest) |
| Infernal | 120–230 Armor & Spell Shield Points · More damage to Raid Bosses · Slightly higher chance for the 3rd attack's bonus (rare) · +5 to +7 Strength and +5 to +7 Accuracy (rare) · A slight chance to dodge an Attack Spell (rarest) |
Imbuing & removing gemstones
- Open your Backpack and click the jewelry to open its item details.
- Click the empty socket under the item ID. Your Backpack switches to your gemstones, highlighted in yellow.
- Click the gemstone you want. It is placed in the socket, its bonus applies, and its timer starts.
To remove a gemstone, open the jewelry's details, then click and hold its socket for 3–5 seconds. A red X appears; keep holding, slide onto the X and release. The gemstone is destroyed, not returned.
The spellbook
Spells
To write a spell's scroll, both your Inscription and your Magery must reach the listed skill.
| Spell | Circle | Skill | Mana | Target | Effect |
|---|---|---|---|---|---|
| Cure | I | 0% | 35 | Self / ally | Removes poison and paralysis. |
| Reactive Armor | I | 10% | 50 | Self / ally | Bonus armor for 30 minutes, scaled by the target's Magery. Dispellable. |
| Harm | I | 20% | 20 | Enemy | Direct damage. |
| Poison | I | 30% | 35 | Enemy | Drains health for one minute; only Cure removes it. Dispellable. |
| Dispel | II | 40% | 30 | Self / ally | Strips every spell effect from the target, good and bad. |
| Protection | II | 50% | 60 | Self / ally | For 30 minutes, a chance to take no damage from a hit; better with higher Magery. Dispellable. |
| Energy Bolt | II | 60% | 30 | Enemy | Direct damage. |
| Incognito | II | 70% | 70 | Self | For 30 minutes you scan as a mortal and hide from Perception; anyone who recognizes you can still attack. Dispellable. |
| Magic Reflection | III | 80% | 99 | Self / ally | Reflects the first successful spell cast on the target, then fades; otherwise lasts 30 minutes. Dispellable. |
| Mana Vampire | III | 90% | 10 | Enemy | Drains all of the target's mana. |
| Flame Strike | III | 98% | 80 | Enemy | Heavy direct damage. |
| Paralyze | III | 100% | 70 | Enemy | Freezes the target's HUDs for 45 seconds. Only an ally (or a careless foe) can dispel it. |
| Leech | IV | 110% / 100% | 50 | Self / ally | For one minute, a chance to take part of the damage dealt back as health. Dispellable. |
| Mana Surge | IV | 110% / 100% | 80 | Self | For 30 minutes, raises maximum mana to 130 at 110% Magery (110 below that), not counting the Channeling Pylon. Dispellable. |
| Life Flare | IV | 110% / 100% | 50 | Self | A 30% chance to survive a killing blow; lasts 30 minutes or until it triggers. Dispellable. |
| Rejuvenation | IV | 110% / 100% | 70 | Ally | Heals the last damage the target took in the past 5 minutes, with a bonus heal at 110% Magery. |
Fourth-circle scrolls need 110% Inscription and 100% Magery, and the spells are weaker unless you cast them at 110% Magery. Lasting spells run for at least 30 minutes, longer with higher Intelligence.
The path to Legendary Artisan
More Professions
Beyond the great crafts, the Backpack tracks further skills. Every profession caps at 100%, and ancient tomes can raise that cap further.
Bring the first seven profession skills (all but Chiseling, Gemcutting and Jewelcrafting) to at least 98%, all at the same percentage, and you are named a Legendary Artisan. Max all ten profession skills at 100% and you become an Epic Craftsman, with 50 Tairise Relics the first time.
Meditation
Still your mind on a meditation rug to grow your inner strength.
Perception
Sense the spiritual beings around you.
Awareness
Hear the sounds of battle from farther away.
Relics & artifacts
Tanks & Depositories
Rez them on your land to store what keeps you alive. Each starts in Owner mode; set the object's group and choose Set Access → Group to share it with your Horde or Choir.
Blood Tanks & Brightness Containers
Deposit spare health and withdraw it when you need it, never more than your maximum, never more than the tank holds.
Essence & Erg Depositories
Keep your Demonic Essence or Light Ergs safe from being lost when you fall in battle.
| Blood / Brightness capacity | Price | Essence / Erg capacity | Price |
|---|---|---|---|
| 10,000 | L$800 | 50 | L$1,000 |
| 30,000 | L$1,500 | 150 | L$2,500 |
| 100,000 | L$4,500 | 500 | L$4,500 |
Relics & artifacts
Essence & Erg Vials
Essence and Ergs are spent to descend or transcend mortals and to revive the fallen. Vials let you add them to yourself, or send them to any member of your species by UUID, no need to be near them. Wear the vial and choose Myself or Someone.
| Vial | 5 | 10 | 30 | 60 | 100 |
|---|---|---|---|---|---|
| Price | L$300 | L$500 | L$1,300 | L$2,400 | L$4,300 |
Relics & artifacts
Revival Altars
A banished Demon returns through the Possession Altar; a faded Angel through the Restoration Chamber. Find them in Heaven and Hell, or own one yourself (L$4,500).
- The fallen sits in the altar or chamber and presses Activate.
- A stand appears; the reviver sits on it and the fallen presses Proceed.
- The altar asks the reviver to sacrifice 2 Demonic Essence or 2 Light Ergs; they answer “I do” in local chat.
- The fallen proceeds one final time and returns, materialized or vibrant.